Pertama : siapkan dlu peralatan perang ente
- 2 Komputer, 1 client 1 server
- 2 NIC untuk server
- Kable cross dan straight.
- Centos 6.4
- Secangkir kopi, sebungkus rokok atau sebungkus kuaci :v
langkah 1, buat dns server
install bind :
yum install bind* -y
tmbahkan tkj.com pada /etc/hosts
192.168.12.1 www.tkj.com
192.168.12.1 mail.tkj.com
#ini dua diatas ditambahkan, bukan ngedit 1 file hosts.
sekarang konfigurasi file /etc/named.conf ( hati hati, disini sensitip )
vi /etc/named.conf
//
// named.conf
//
// Provided by Red Hat bind package to configure the ISC BIND named(8) DNS
// server as a caching only nameserver (as a localhost DNS resolver only).
//
// See /usr/share/doc/bind*/sample/ for example named configuration files.
//
options {
listen-on port 53 { 127.0.0.1; 192.168.12.1; }; //IP Yang di listen ip server kamu
directory "/var/named";
dump-file "/var/named/data/cache_dump.db";
statistics-file "/var/named/data/named_stats.txt";
memstatistics-file "/var/named/data/named_mem_stats.txt";
allow-query { localhost; 192.168.12.0/24; }; // alamat jaringan LAN kamu dengan client
recursion yes;
};
logging {
channel default_debug {
file "data/named.run";
severity dynamic;
};
};
zone "." IN {
type hint;
file "named.ca";
};
zone "tkj.com" IN { //SET DENGAN NAMA DOMAIN LOKAL YG KAMU MAU :P
type master;
file "/var/named/tkj.com.zone"; // ARAHKAN KE SINI, BOLEH DIGANTI, KARENA INI TEMPAT KONFIGURASI FILE tkj.com
allow-update { none; };
};
zone "12.168.192.in-addr.arpa" IN { //ALAMAT JARINGAN KAMU YANG DIBALIK, MISAL 192.168.12 JADI 12.168.192
type master;
file "/var/named/12.168.192.rev"; //ARAHKAN KESINI
allow-update { none; };
};
include "/etc/named.rfc1912.zones";
include "/etc/named.root.key";
konfigurasi lagi /var/named/tkj.com.zone < contoh saja sy memakai tkj.com
$TTL 86400
@ IN SOA tkj.com. root.tkj.com. (
100 ; serial
1H ; refresh
1M ; retry
1W ; expiry
1D ) ; minimum
@ IN NS ns1.tkj.com.
@ IN A 192.168.12.1
ns1 IN A 192.168.12.1
@ IN MX 10 mail.tkj.com.
mail IN A 192.168.12.1
WWW IN A 192.168.12.1
konfigurasi lagi /var/named/12.168.192.rev :
$TTL 86400
@ IN SOA tkj.com. root.tkj.com. (
100 ; serial
1H ; refresh
1M ; retry
1W ; expiry
1D) ; minimum
@ IN NS ns1.tkj.com.
1 IN PTR binggo.tkj.com.
Setelah itu restart service :
service named restart
Setelah itu Cek :
nslookup tkj.com
Server: 192.168.12.1
Address: 192.168.12.1#53
Name: tkj.com
Address: 192.168.12.1
Berarti DNS server anda sudah berhasil. selamat * prok prok prok
Kedua Webserver :
Pertama Kita Install httpd dlu
[root@www ~]#yum -y install httpd
# remove welcome page
[root@www ~]#rm -f /etc/httpd/conf.d/welcome.conf
# remove default error page
[root@www ~]#rm -f /var/www/error/noindex.html
# create a link for Perl
[root@www ~]#ln -s /usr/bin/perl /usr/local/bin/perl
Kedua kita konfigurasi Webservernya :
[root@www ~]#vi /etc/httpd/conf/httpd.conf
# line 44: change
ServerTokens Prod
# line 76: change to ON
KeepAlive On
# line 262: Admin's address
ServerAdminroot@tkj.com
# line 276: change to your server's name
ServerName www.tkj.com:80 //untuk namanya
# line 331: change (enable CGI and disable Indexes)
Options FollowSymLinks ExecCGI
# line 338: change
AllowOverride All
# line 402: add file name that it can access only with directory's name
DirectoryIndex index.html index.cgi index.php
# line 536: change
ServerSignature Off
# line 759: make it comment
#AddDefaultCharset UTF-8
# line 796: uncomment and add file-type that apache looks them CGI
AddHandler cgi-script .cgi .pl
[root@www ~]#/etc/rc.d/init.d/httpd start
Starting httpd:[ OK ]
[root@www ~]#chkconfig httpd on
Ketiga, buat file indexnya, contoh
[root@www ~]#vi /var/www/html/index.html
<html>
<body>
<div style="width: 100%; font-size: 40px; font-weight: bold; text-align: center;">
Test Page
</div>
</body>
</html>
Ketiga FTP Server.
Sebenarnya ada 2 aplikasi untuk ftp server, yaitu vsftp dan proftpd. yang sy gunakan yaitu vsproftpd karena simpel
oke kita mulai :
install dlu FTP server nya
yum install -y vsftp
setelah kita install kita konfigurasi /etc/vsftpd.conf
Tambahkan pada line kosong :
anonymous_enable=NO
local_enable=YES
write_enable=YES
local_umask=022
anon_upload_enable=NO
local_root=/srv/ftp
anon_mkdir_write_enable=NO
xferlog_file=/var/log/vsftpd.log
ftpd_banner=Welcome to SM's FTP service.
Setelah itu, restart service dengan perintah :
service vsftp restart
note :
Secara default direktori untuk pertukaran data berada di direktori /srv/ftp. Anda dapat menaruh beberapa file atau membuat folder untuk melihat hasil daripada konfigurasi FTP Server yang telah anda lakukan. Letakan semua file atau folder di direktori /srv/ftp.
untuk mengubah ganti local_root ke direktori yang anda mau. cth :
local_root=/var/ftp
+
a. Anonymous FTP Server
1. Langkah pertama untuk membuat Anonymous FTP server adalah
dengan mengedit beberapa baris pada file /etc/vsftpd.conf. Lakukan
dengan perintah pico /etc/vsftpd.conf lalu tekan enter.
Uncoment pada bagian anonymous_enable=YES
2. Langkah selanjutnya adalah merestart service vsftpd dengan perintah :
/etc/init.d/vsftpd restart
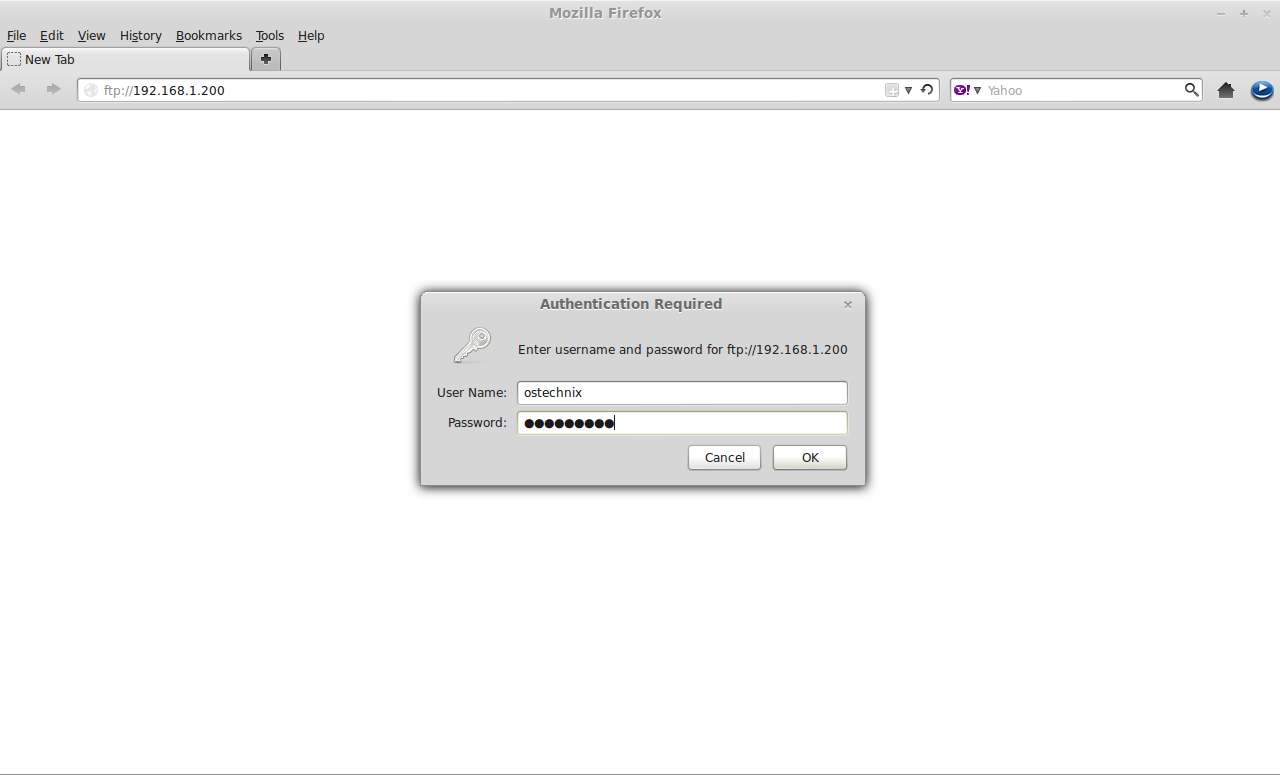
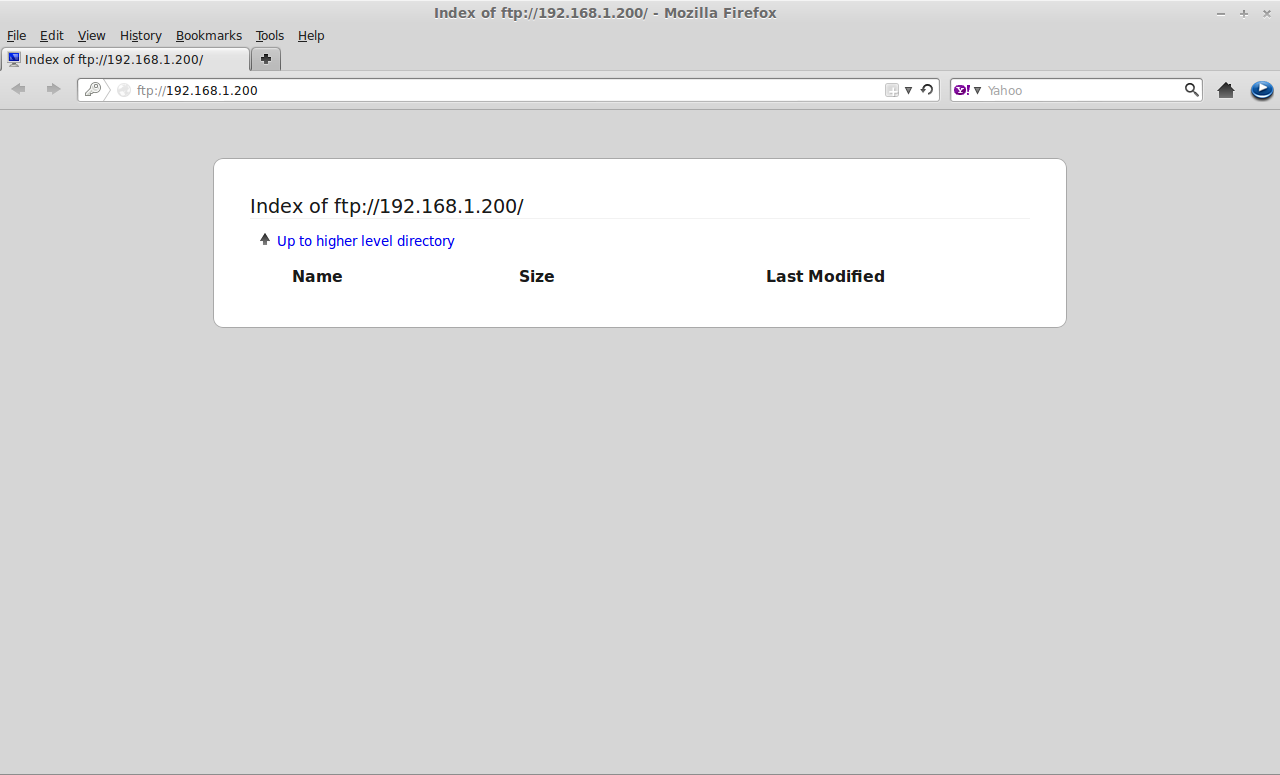
3. Setelah itu lakukan pengujian dengan mengakses FTP Server tersebut
dari browser dengan mengetikkan :
ftp://ip_address
atau
nama_domain
Untuk membuktikan apakah FTP Server tersebut benar-benar sudah
dalam mode Anonymous, maka coba copy-kan sembarang file ke
directory download yang telah dibuat sebelumnya. Jika sudah,
selanjutnya coba akses lagi FTP Server tersebut dan download file
yang sudah kita masukan ke directory download tersebut.
Jika bisa didownload, maka FTP Server kita sudah berhasil dibuat
dengan mode Anonymous.
b. User FTP Server
1. Langkah pertama untuk membuat Anonymous FTP server adalah
dengan mengedit beberapa baris pada file /etc/vsftpd.conf. Lakukan
dengan perintah :
pico /etc/vsftpd.conf lalu tekan enter.
Uncomment pada bagian local_enable=YES
2. Selanjutnya buat satu user baru untuk menguji FTP Server tersebut.
Buat user baru dengan perintah adduser nama_user, misalnya :
adduser lindung lalu tekan enter.
3. Selanjutnya uji apakah FTP Server tersebut sudah bias digunakan
sebagai User FTP dengan mengakses alamat FTP Server tersebut.
Jika sudah muncul window untuk memasukkan username dan
password, masukkan username dan password dari user yang telah
dibuat tadi.
Keempat :
PCROUTER CENTOS 6.4 .3 dkk
pertama matikan dlu firewall centos. di system -> administration -> firewall. disable
kalau tidak bs melangkah ke langkah 2
kedua matikan NetworkManager & aktifkan network
service NetworkManager stop
service network start
set eth0
DEVICE=eth0
BOOTPROTO=static
TYPE=Ethernet
IPADDR=192.168.1.2
NETMASK=255.255.255.0
set eth1
DEVICE=eth0
BOOTPROTO=static
TYPE=Ethernet
IPADDR=192.168.12.1
NETMASK=255.255.255.0
stelah itu, set ip gateway dari server.
vi /etc/sysconfig/network
NETWORKING=yes
GATEWAY=192.168.1.1
Set DNS
nameserver 192.168.12.1 // dns server yg kita set tadi
namserver 8.8.8.8 // backup
selanjutnya edit /etc/sysctl.conf
ubah / uncomment di bagian net.ipv4 = 0
ubah jadi 1 dan uncomment
selanjutnya
echo "1" > /proc/sys/net/ipv4/ip_forward
iptables -t nat -A POSTROUTING -j MASQUERADE
selesai..
kini centos server anda sudah jadi PCROUTER, DNS, WEB, dan FTP server
Mau bikin Samba Sever Lagi ? ikuti langkah nya
Cara buat samba server :
pertama kan sudah setting ip server dan client..
nah lanjut,
add user samba,
useradd tkj // atur user tkj
smbpasswd -a tkj // atur password tkj di samba
terus kita buat direktori yang kita mau share, misal kita mau share /home/tkj
mkdir /home/tkj/samba // dibuat dlu gan :D
chmod 777 /home/tkj/samba -R // -R untuk mnampilkan semua yang ada di dalam direktori
sudah itu toh, konfigurasi /etc/samba/samba.conf
nah, di bagian security = user, ubah dia jadi security = share biar bisa semua.. next
bikin mi path yang mau di share
[nama mau dishare ini gan]
path = /home/tkj #ini yang mau kita share
browseable = yes # biar bisa di browse
writeable = yes # biar bisa di write sama user wedus
guest = yes # adakan saja.. paganna ganna ju
setelah itu kita service samba restart atau service smb restart atau /etc/init.d/smb restart
test deh, ketik testparm dan lihat apakah direktori yang anda share ada atau tidak, kalau tidak silahkan diulang dolo :D